Most homeowners start painting cabinets with excitement — imagining smooth, flawless finishes that make a kitchen look brand new. But once the paint dries, reality often sets in: brush marks, sticky surfaces, uneven color, or peeling paint that chips the moment you touch a handle.
The good news? Most mistakes in painting cabinets can be fixed — and the results can still look like they came straight from a showroom. You just need to understand why these problems happen and how professionals correct them.
At Four Pillars Paint, we specialize in cabinet painting throughout Sewickley, PA, and we’ve rescued more than a few DIY projects that went off track. Here’s what we’ve learned about fixing the most common issues — and how to get your cabinet finish looking right, once and for all.
Why Cabinet Painting Mistakes Happen
Before we get into the fixes, let’s look at the root causes. When you understand why paint fails, you can fix it more effectively — or better yet, prevent it next time.
The Most Common Reasons Paint Fails on Cabinets
-
Poor surface prep – Grease, residue, or dust prevent paint from bonding properly.
-
No primer or wrong primer – Without a bonding layer, paint just sits on the surface instead of fusing to it.
-
Using the wrong paint – Wall paint is too soft for high-traffic cabinetry.
-
Humidity and temperature issues – Paint can’t dry or cure properly in unstable conditions.
-
Rushing between coats – Leads to tacky finishes or roller marks that never settle.
Professional cabinet painters avoid these problems with strict prep standards. We use bonding primers such as Benjamin Moore STIX or Sherwin-Williams Extreme Bond Primer, and durable urethane-fortified enamels designed for furniture-grade finishes. Every surface is cleaned with Krud Kutter Deglosser to remove oils and create a texture that allows paint to adhere for years.
Common Cabinet Painting Problems and Their Causes
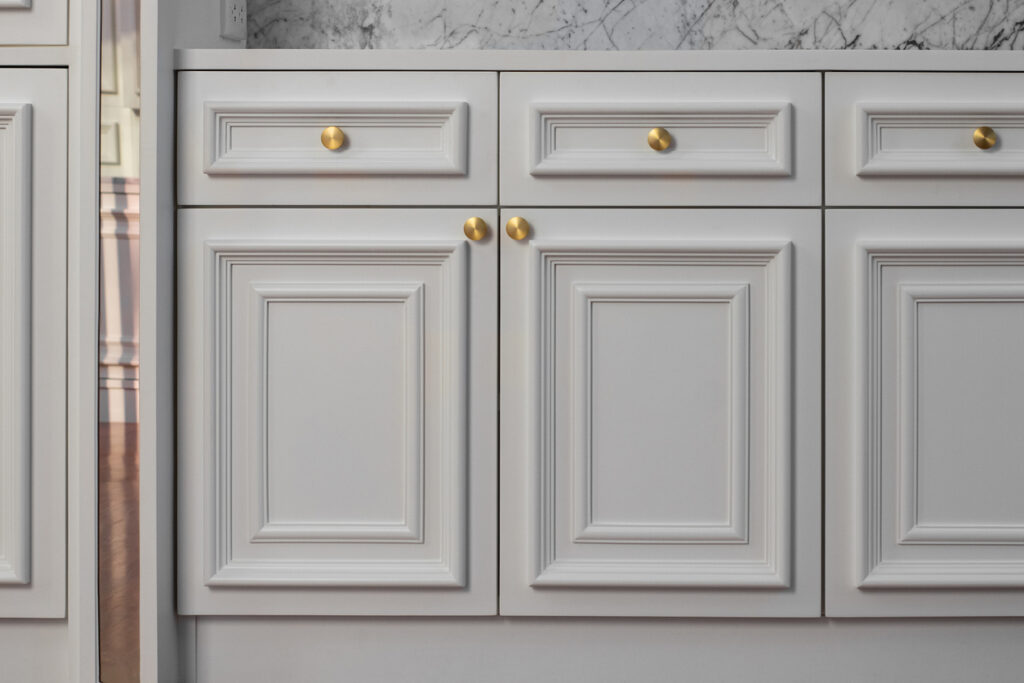
Close-up of the room’s white wood cabinets
| Problem | Likely Cause | Quick Fix |
|---|---|---|
| Paint peeling easily | Skipped primer or poor adhesion | Sand lightly, apply bonding primer, recoat |
| Visible brush/roller marks | Wrong brush or paint type | Sand smooth, use self-leveling enamel |
| Sticky, tacky surfaces | Insufficient drying or humidity | Allow full cure, sand, and recoat |
| Uneven color | Uneven coverage or poor mixing | Stir paint, apply consistent second coat |
| Grain showing | Not enough sanding or filler | Sand with 320 grit, use grain filler primer |
| Chips near handles | Weak adhesion or no topcoat | Prime edges and apply urethane topcoat |
| Paint drips or runs | Heavy coats | Let dry, sand level, and reapply thin layers |
| Dull or patchy finish | Poor curing conditions | Polish gently or apply clear finish |
8 Genius Fixes for Common Painting Cabinets Mistakes
Here’s how professionals correct the most frequent painting cabinets problems — and the exact products and methods that make the difference.
1. When Paint Peels — Rebuild the Bond
Symptom: Paint flakes or chips off within days or weeks.
Cause: Poor adhesion — either from skipping primer or applying paint on oily, glossy surfaces.
Fix:
Lightly sand the affected area with 180–220 grit sandpaper. Clean using TSP substitute or degreaser, then apply a bonding primer like INSL-X STIX or Zinsser BIN Shellac. Once dry, recoat with a cabinet-grade enamel such as Sherwin-Williams Emerald Urethane.
Pro Insight: Professionals often spray thin, even layers using HVLP systems. This not only smooths out peeling edges but ensures maximum adhesion between coats.
Why It Works: These primers chemically bond to slick surfaces, creating a permanent foundation for enamel coatings to grip.
2. When Brush Marks or Roller Lines Don’t Disappear
Symptom: Uneven texture or streaks visible under bright light.
Cause: Using the wrong roller, cheap brush, or paint that doesn’t self-level.
Fix:
Sand gently with 320–400 grit sandpaper until smooth. Switch to a self-leveling cabinet enamel — like Benjamin Moore Advance or Emerald Urethane — which naturally flows out brush lines. Use a microfiber roller or high-quality synthetic brush for fine finishes.
Pro Tip: Always maintain a wet edge and apply paint in thin, even passes. Two light coats are better than one heavy one.
Why It Works: Self-leveling enamels contain slow-drying resins that give the paint time to smooth before setting — mimicking a sprayed finish.
3. When the Finish Feels Sticky or Soft
Symptom: Cabinets feel tacky even after several days.
Cause: High humidity or applying paint too thickly between coats.
Fix:
Increase airflow and reduce humidity with a fan or dehumidifier. Allow at least 7 days for full hardness. If the finish remains soft, lightly sand and recoat using a fast-curing hybrid enamel like PPG Break-Through!
Pro Insight: Urethane-modified paints cure via crosslinking — forming a tough film that resists sticking and soft spots.
Why It Works: Hard-curing enamels create molecular bonds that strengthen over time, resulting in a durable, furniture-grade finish that doesn’t tack or dent.
4. When Paint Drips or Sags
Symptom: Paint gathers in ridges or runs.
Cause: Applying too much paint or painting vertically before the previous coat has dried.
Fix:
Let the drips dry completely, then sand flat with 320-grit paper. Wipe clean and reapply paint in thin, even coats. Keep cabinet doors flat while painting to prevent gravity-driven runs.
Pro Tip: HVLP spraying helps regulate film thickness — producing consistent coverage without runs.
Why It Works: Even film thickness allows solvent evaporation to occur uniformly, preventing heavy spots from sagging.
5. When Grain or Texture Shows Through
Symptom: Wood grain, especially oak, remains visible after two or three coats.
Cause: Open-grain wood and lack of filler primer.
Fix:
Apply Aqua Coat White Cabinet Grain Filler, spreading it evenly across the surface. Once dry, sand flush and prime with a filler primer such as BIN Shellac before painting.
Pro Insight: Professional painters spray two coats of grain filler primer to create a seamless, “factory finish” surface before applying enamel.
Why It Works: Filling grain eliminates surface peaks and valleys, letting light reflect evenly and giving that ultra-smooth look typical of custom cabinetry.
6. When Color Appears Uneven or Patchy
Symptom: Panels show lighter or darker areas under certain lighting.
Cause: Uneven film thickness, inconsistent stirring, or mismatched primer color.
Fix:
Stir paint thoroughly before and during application to keep pigments suspended. Apply an even coat and allow full dry time before recoating. For darker shades, use a tinted primer to improve color uniformity.
Pro Insight: Professional cabinet painters always strain paint before use to remove pigments or clumps that could cause streaking.
Why It Works: Uniform pigment dispersion and consistent base color prevent optical variation once the finish cures.
7. When Edges Chip Too Easily
Symptom: Corners and handle areas lose paint quickly.
Cause: Weak adhesion or lack of topcoat protection.
Fix:
Spot-sand edges, apply bonding primer, and seal with a urethane-fortified topcoat such as General Finishes High Performance Poly.
Pro Insight: In our cabinet painting projects across Sewickley, PA, we cure cabinet doors for several days before reinstalling to prevent early damage.
Why It Works: Proper cure time allows paint polymers to harden fully, forming a rigid, impact-resistant surface that resists edge wear.
8. When the Sheen Looks Dull or Uneven
Symptom: Finish looks flat, cloudy, or patchy.
Cause: Inconsistent curing conditions or mixing paint from different batches.
Fix:
Allow paint to cure under stable humidity and temperature. If sheen remains inconsistent, gently buff with a fine pad or apply a clear topcoat.
Pro Tip: For a subtle luster, recoat with a thin layer of matching enamel or a compatible clear coat.
Why It Works: Even reapplication ensures uniform film gloss while sealing any micro-porosity that scatters light.
Best Products for Professional-Grade Cabinet Refinishing
| Step | Product Example | Why It Works |
|---|---|---|
| Degreasing | Krud Kutter Deglosser | Removes oils and silicone for better primer adhesion |
| Priming | INSL-X STIX / BIN Shellac | Bonds to glossy or laminate surfaces |
| Painting | Emerald Urethane / Advance / Break-Through! | Durable, self-leveling, moisture-resistant finish |
| Topcoating | General Finishes Polyurethane | Adds hardness, clarity, and moisture protection |
How Professionals Prevent These Issues Entirely
Even with the best intentions, DIYers are limited by home environments — dust, humidity, and lack of spray equipment all impact results. Professional painters eliminate these variables entirely.
At Four Pillars Paint, our cabinet painting system includes:
-
Climate control: Painting in 65–75°F and 40–50% humidity ensures consistent curing.
-
HVLP spraying: Provides even coverage without brush lines or texture.
-
Multi-stage prep: Degrease, sand, prime, coat, cure, and seal — each stage timed precisely.
-
Product pairing: Using primers and paints designed to work together chemically for superior adhesion.
Professionals don’t just repaint; they refinish. The result is a durable, washable, furniture-grade coating that stands up to years of cleaning, heat, and daily use.
For insight into how conditions and materials affect coating longevity, check out our related post on exterior painting cost factors.
Common Questions About Fixing Cabinet Painting Mistakes
Do I have to strip all the paint to fix peeling cabinets?
Not always. If the base coat is stable, spot-sanding and priming are usually enough. Full stripping is only needed for widespread adhesion failure.
Can I repaint over sticky paint?
Yes — but only after it’s fully dry. Sand lightly to dull the surface, allow airflow, and recoat using a hard-curing enamel.
What’s the best primer for glossy or laminate cabinets?
Bonding primers such as STIX or BIN Shellac are engineered for slick or prefinished surfaces.
How long should I wait before reassembling cabinets?
Wait 48–72 hours for handling and at least 7 days before heavy use. Full hardness develops after 14–30 days, depending on product type.
Can I mix different brands of primer and paint?
It’s risky. Manufacturers design their systems to work together chemically. Mixing brands can cause dulling, peeling, or uneven sheen.
Are eco-friendly cabinet paints available?
Yes. Look for coatings certified under ecolabels on paint and standards on greener products. They meet strict VOC and emission standards without compromising performance.
Conclusion: Fix It Once, Finish It Right
Painting cabinets isn’t just about color — it’s a system of chemical reactions, surface science, and patience. Even if your first attempt didn’t go as planned, these professional fixes can restore your cabinetry to a durable, beautiful finish.
And if the project feels overwhelming, remember — professional cabinet painting from Four Pillars Paint gives you factory-quality results without the trial and error. Our expert team in Sewickley, PA uses premium primers, high-performance enamels, and controlled curing environments to deliver results that last for years.
Whether you’re correcting DIY mishaps or starting fresh, we’ll help you get the kind of finish your kitchen deserves — smooth, strong, and stunning.